If you've landed on this blog post, and have no idea what's going on. Head back to part 1 of this series or part 2 of this series to find out how we got to this point.
In the previous posts in this series, we setup a Gatsby site, and created our first react component - Header. Now we are going to create a few more components to make the project a bit more scalable. First of all, we are going to duplicate the Header component, and rename the new folder Footer. So now inside our components folder, we should have 2 subfolder, Header and Footer.

Now we can open up the index.js file within the newly created Footer folder, and change all references of Header to Footer. Your new component should look something like this:
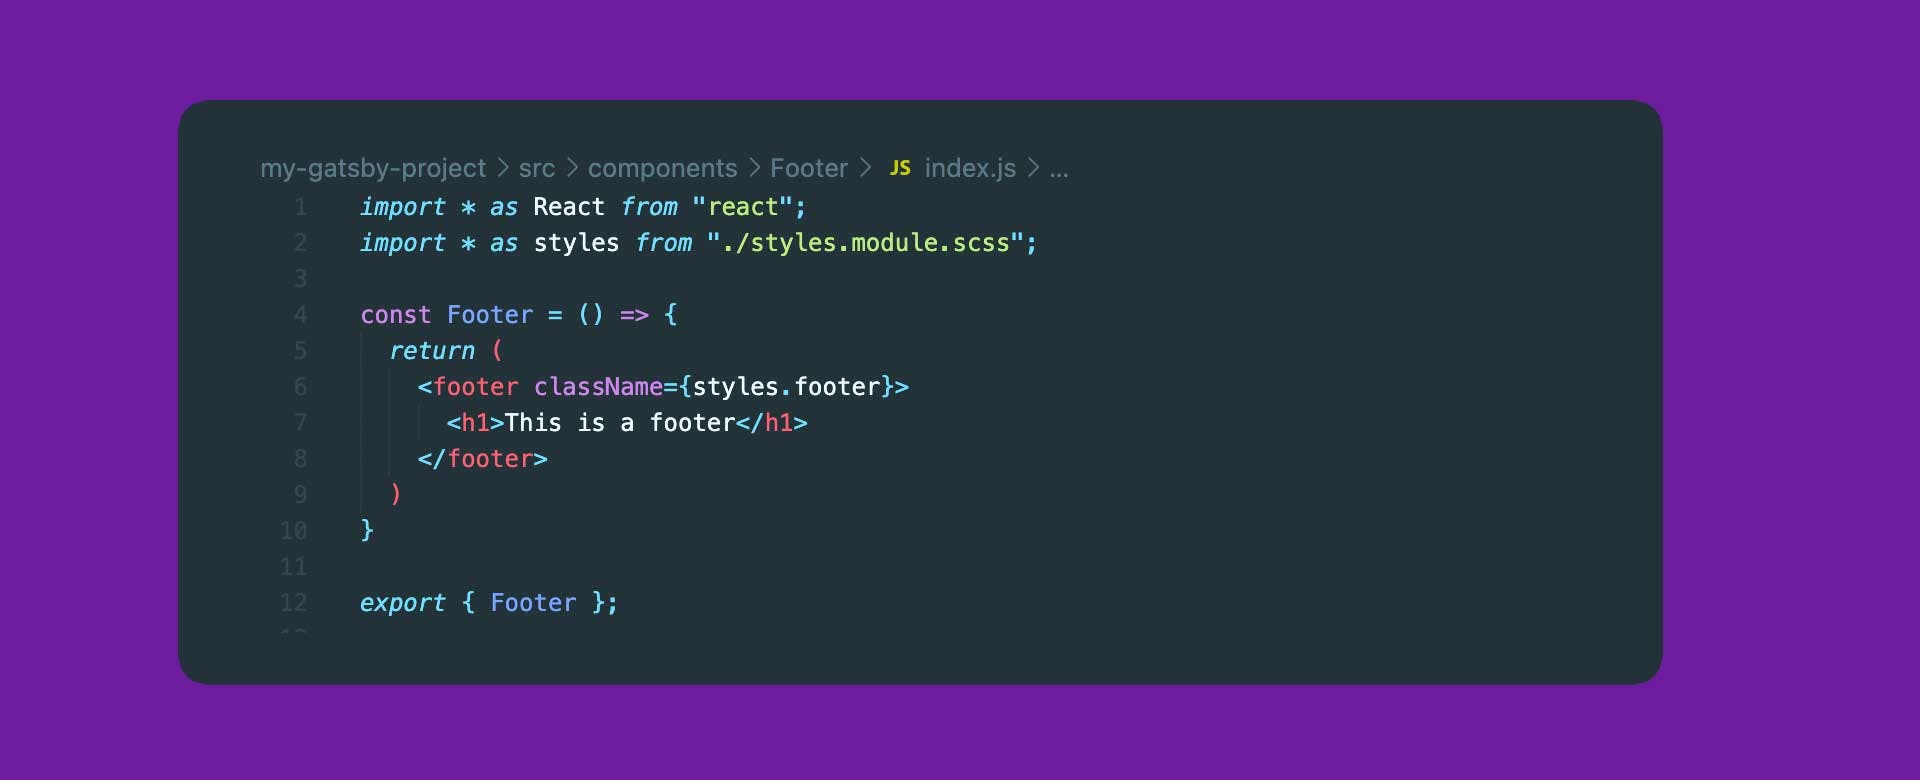
Now we need to do the same to the styles.module.scss file within the Footer folder. Change the class name from .header to .footer.
Once you have created the Footer component, we need to include that on our page template so that we can see it in browser. Go to src/pages/index.js and do everything that we did for the Header component, for the Footer component. React doesn't like it when theres more than one element at the root of the component, so we need to add something called a React Fragment around the two components. A React Fragment is basically just an empty div tag. You can see an example on line 7 in the following image:
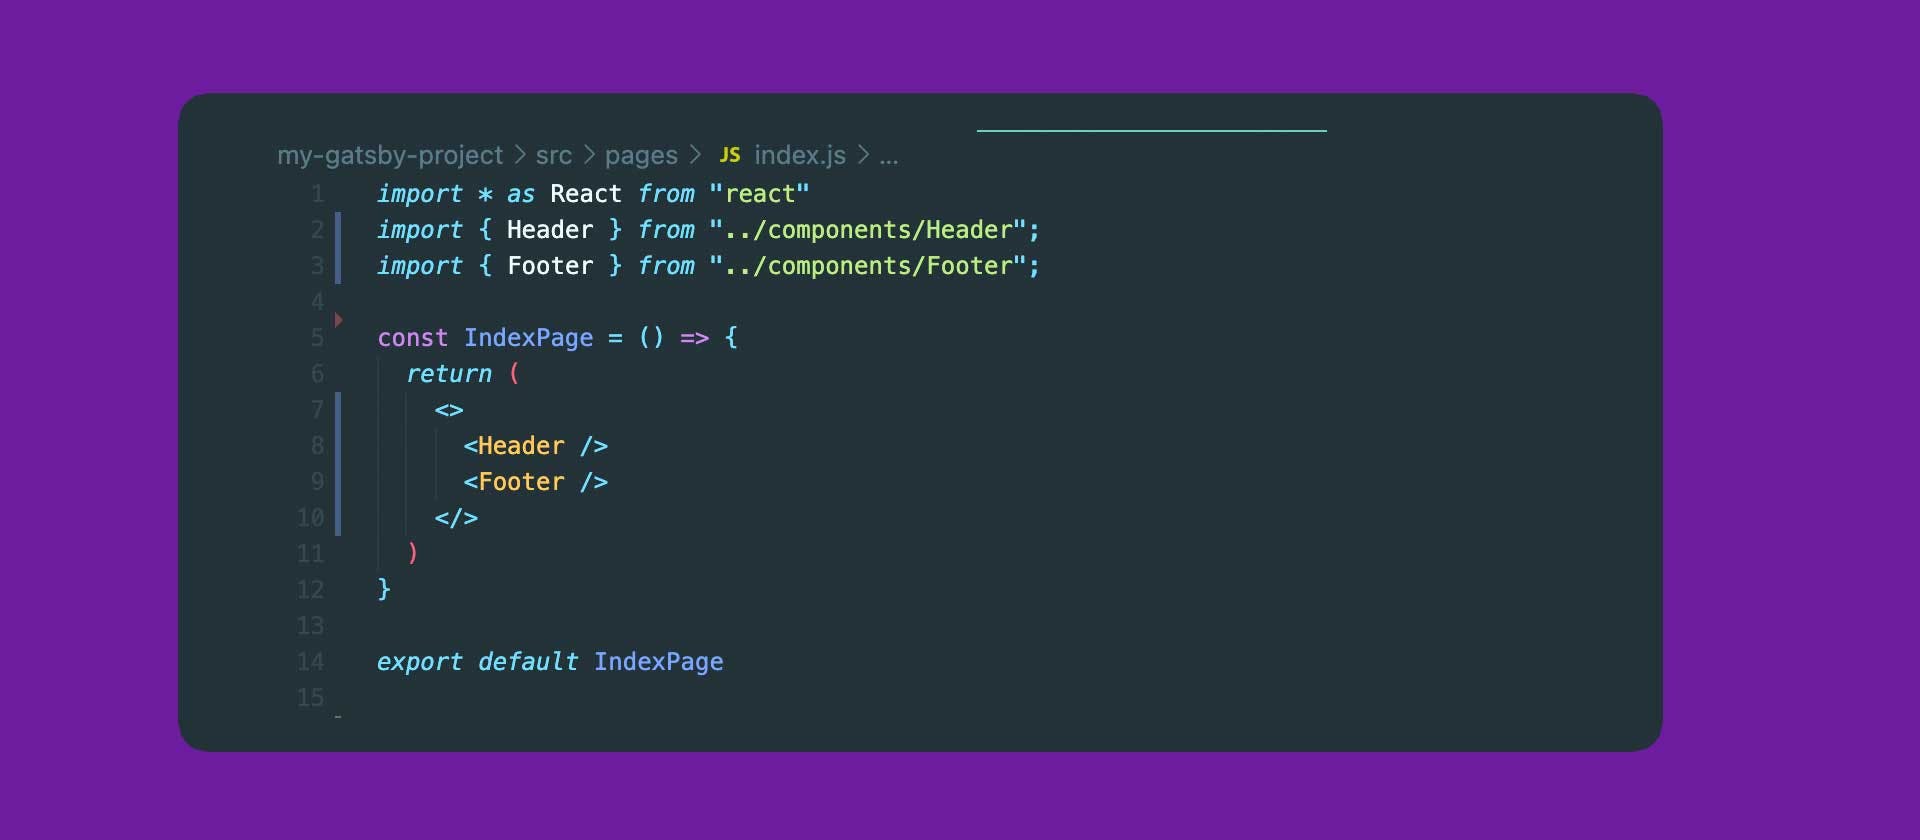
Now save your file, and open up your browser. We should see two fantastically beautiful components - Header and Footer.

It's all well and good creating components, and including them on every template, but that's going to get very tedious, and is not a very scalable solution. If for example we wanted to add a small component below the header, and offer or a notice perhaps, then we would need to go into every template and duplicate our code. We can make things very simple for ourselves by creating a Layout component.
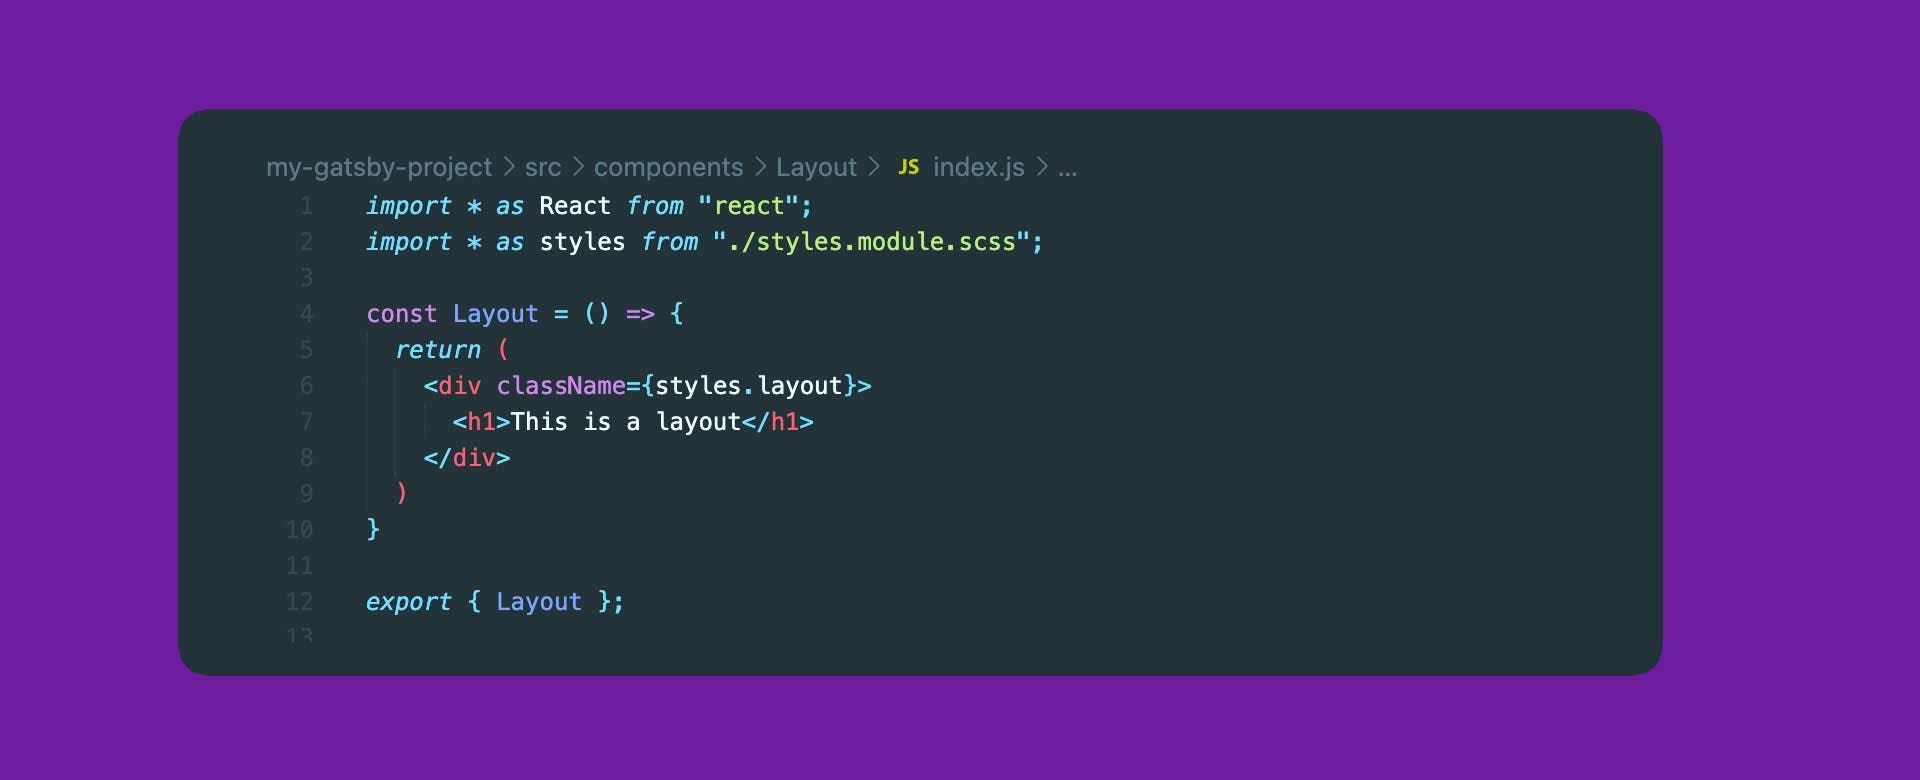
First of all, let's copy and paste the Header folder once again. This time, let's call the new folder Layout. Go ahead and change all of the references from Header / header, to Layout / layout. This time we need to use a div rather than a header or footer tag, so go ahead and replace that on line 6 too. You should have something that looks like this:
Now we need to import our footer and header into the Layout component. We do this just like we did in our src/pages/index.js file. We can render these components inside the layout div, around the text - this is a layout, so you should have something that looks like this:
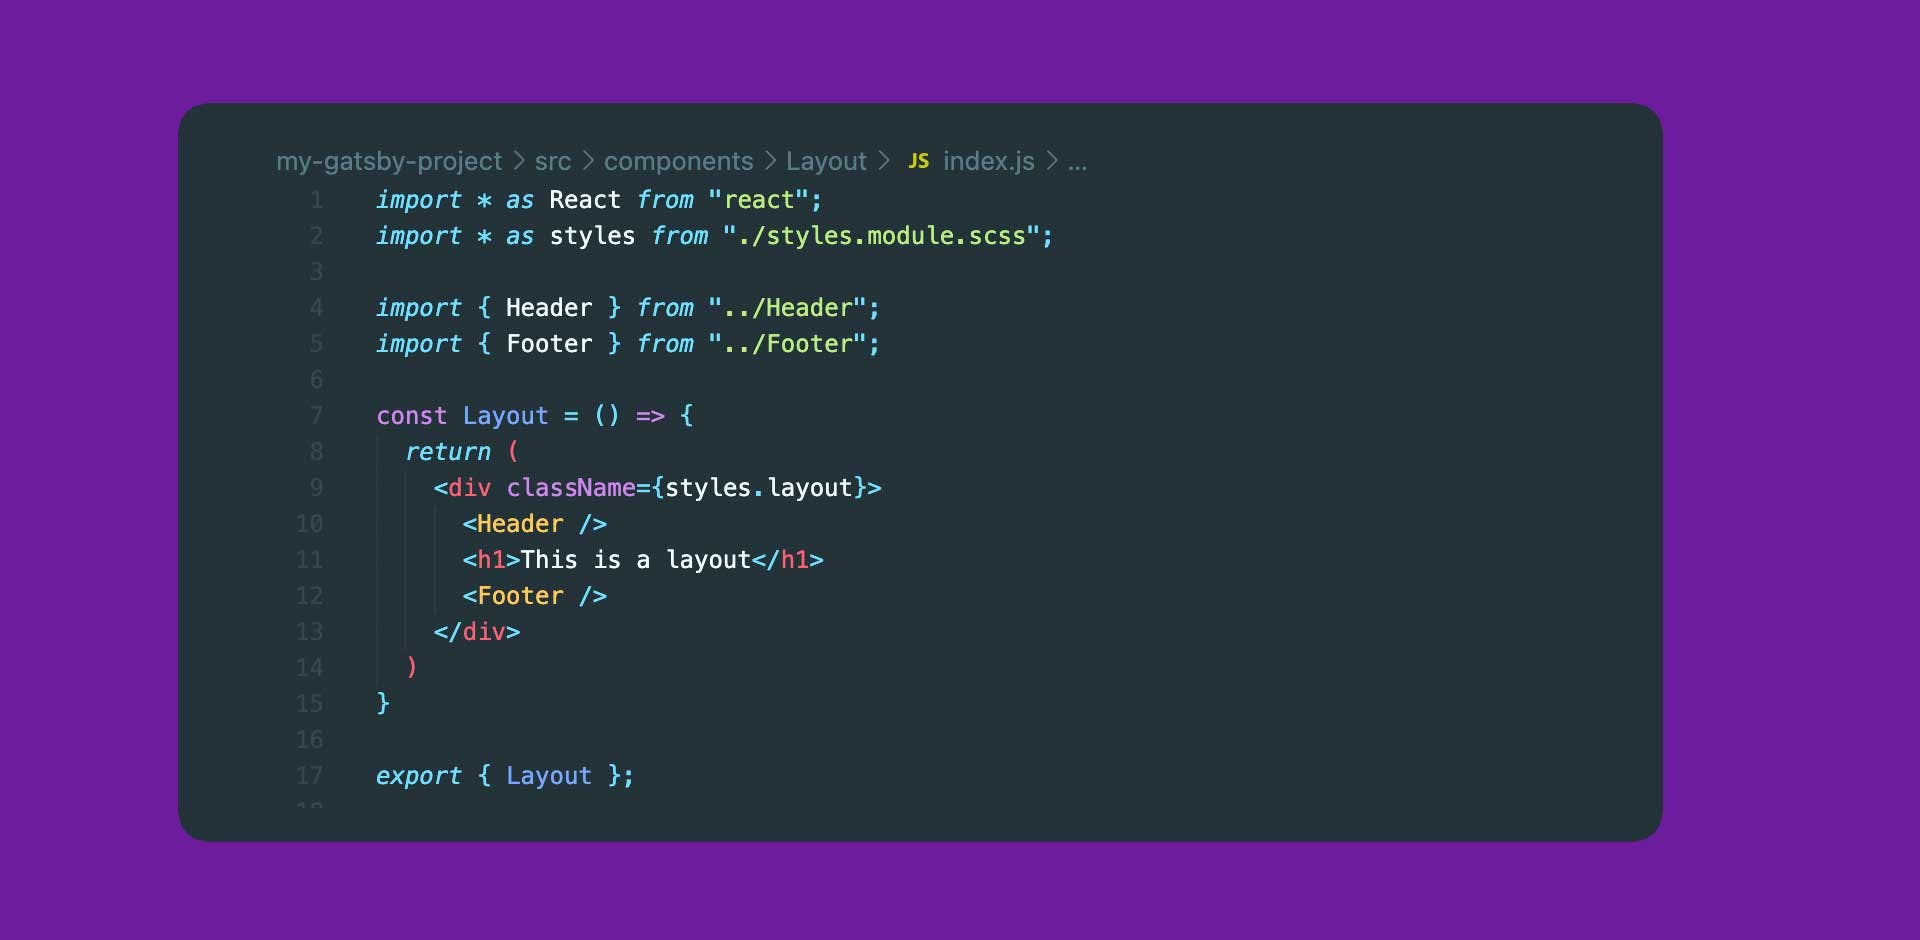
So now every time our layout component is called, Header and Footer will also be called because they are children of layout. This means we can use this component as a building block for lots of templates and pages. To see this component in action, we will import it into the src/pages/index.js file and remove the Header and Footer imports. Because we only have one element at the root of the component, we can also remove the React Fragments. You should have something that looks like this:

Save the file and head to your browser to see what we get!

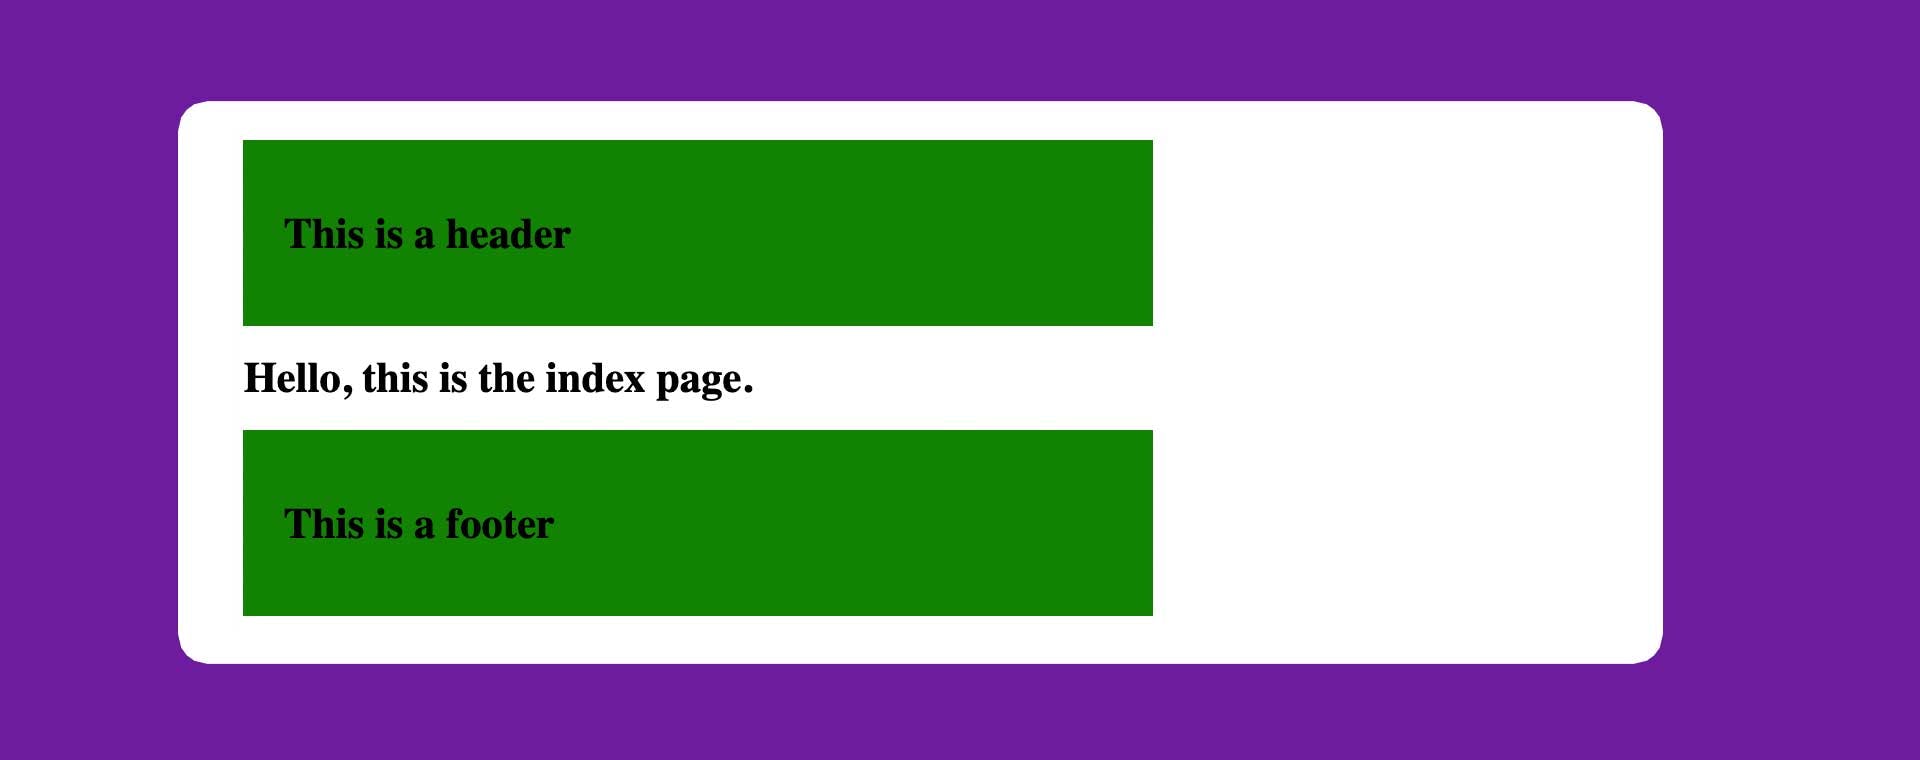
As you can see, our two components (Header and Footer) are being rendered along with our text from the layout component.
Now, to make this Layout component really useful, we can allow items / elements to be passed to it. This means that we can pass content directly from the page templates through the layout component, which will sandwich the content nicely between the header and footer. First of all, we need to tell the layout component, that it should expect some children to be passed to it (children is the term we use to describe elements that are inside other elements). We do this by adding a children prop to the component declaration.
On line 7 of src/components/layout/index.js we need to add 'children' in curly brackets inside the round brackets. Like this:

This means that the Layout component is expecting children to be passed to it. Now we need to render those children. So on line 11, replace the h1 tag with {children}. This will render anything passed to the layout component in this area. Your component should now look like this:

If we check our browser now, you'll notice that nothing is being rendered between the footer and the header. This is because the content is now dynamically being pulled from the template. So let's head over to src/pages/index.js and add some content inside the layout component. I've added a simple H1 that helps us figure out which page we're on.

Now check your browser and you should see something similar to this:
Fantastic! Now we have a layout component, that renders both our footer and our header, and any content that is passed to it. This layout component could now be used on any page template, and the footer and header would be rendered there too! In the next post, we'll create a nav element that lets us switch between pages instantly using the Gatsby Link component.
If you haven't already head back to part 1 of this series or part 2 of this series to see how we got to this point!