If you've landed on this blog post, and have no idea what's going on. Head back to part 1 of this series to find out how we got to this point.
At this point, we have a fully functional Gatsby project up and running. The next thing we want to do is to create some components that we can use throughout the site. Open up your code editor - I use VSCode, but there are tonnes of great options like Sublime Text 3, Brackets, Atom, PHP Storm etc etc. Open the project folder in your code editor, and we should see a folder structure like this:

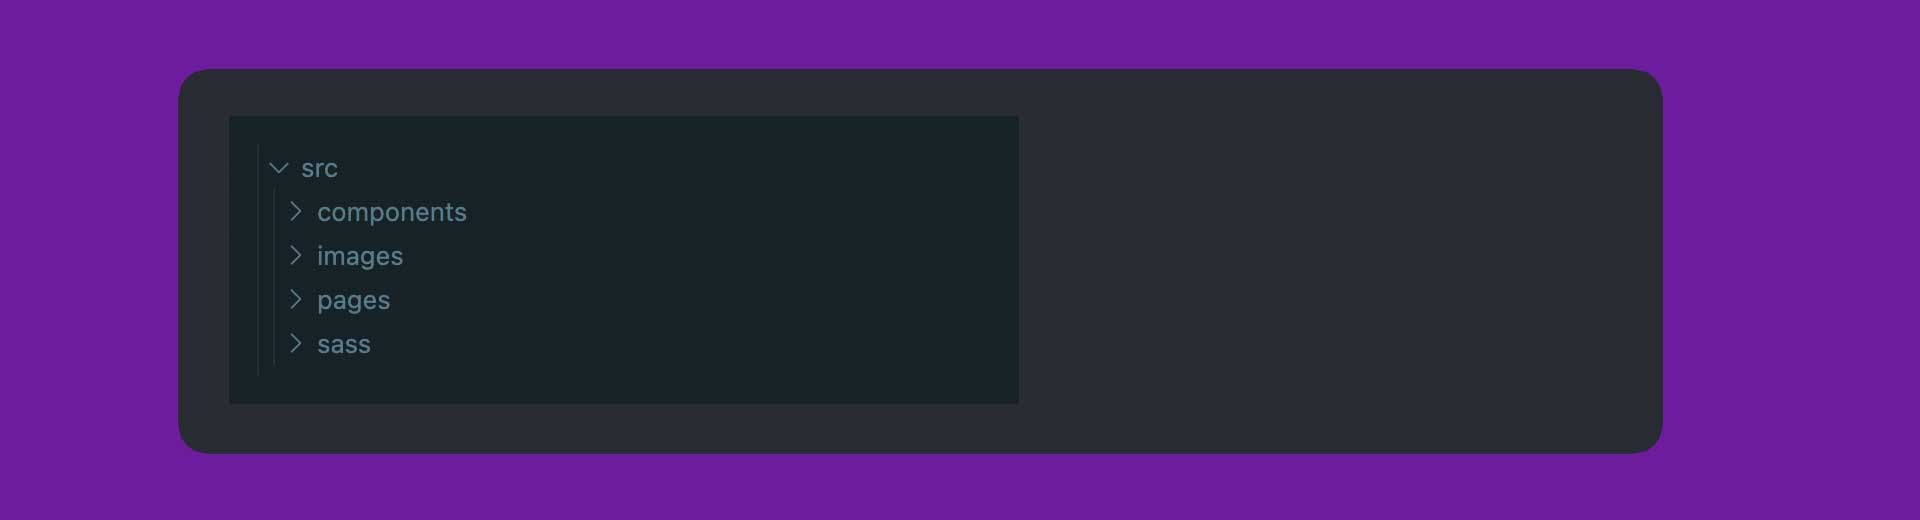
The only sub folder that we're going to be looking at is /src. That's the folder that houses all of our components, pages, styles etc. Inside /src, you'll notice that there are already two folders created for us; Images & Pages. We will use these in a later post, but for now we need to create two more folders; sass & components. After you've done that, your folder should look like this:
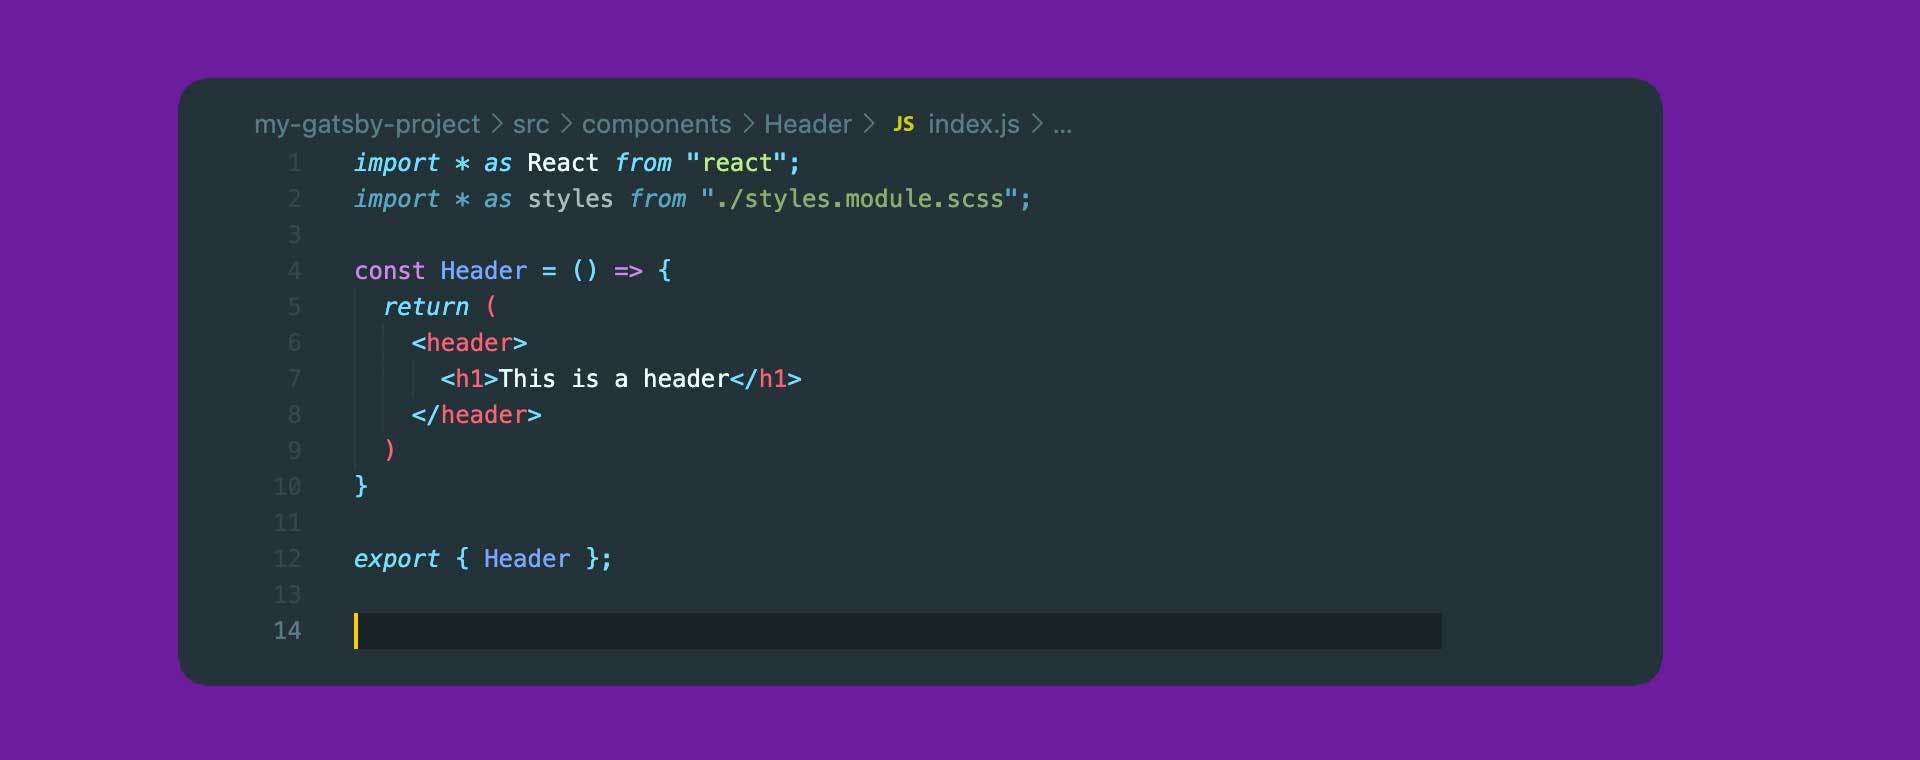
Now it's the fun part - we're going to create our first component. Inside of the /components folder, create a new folder called Header. Inside of the header folder create a file called index.js. The whole relative path of this index file should be src/components/Header/index.js. Open index.js and we'll create our first component. It's going to be a functional component (sometimes called a dumb component). In fact all of the components that we create are going to be functional components. I'll post the code below so that you can copy it.
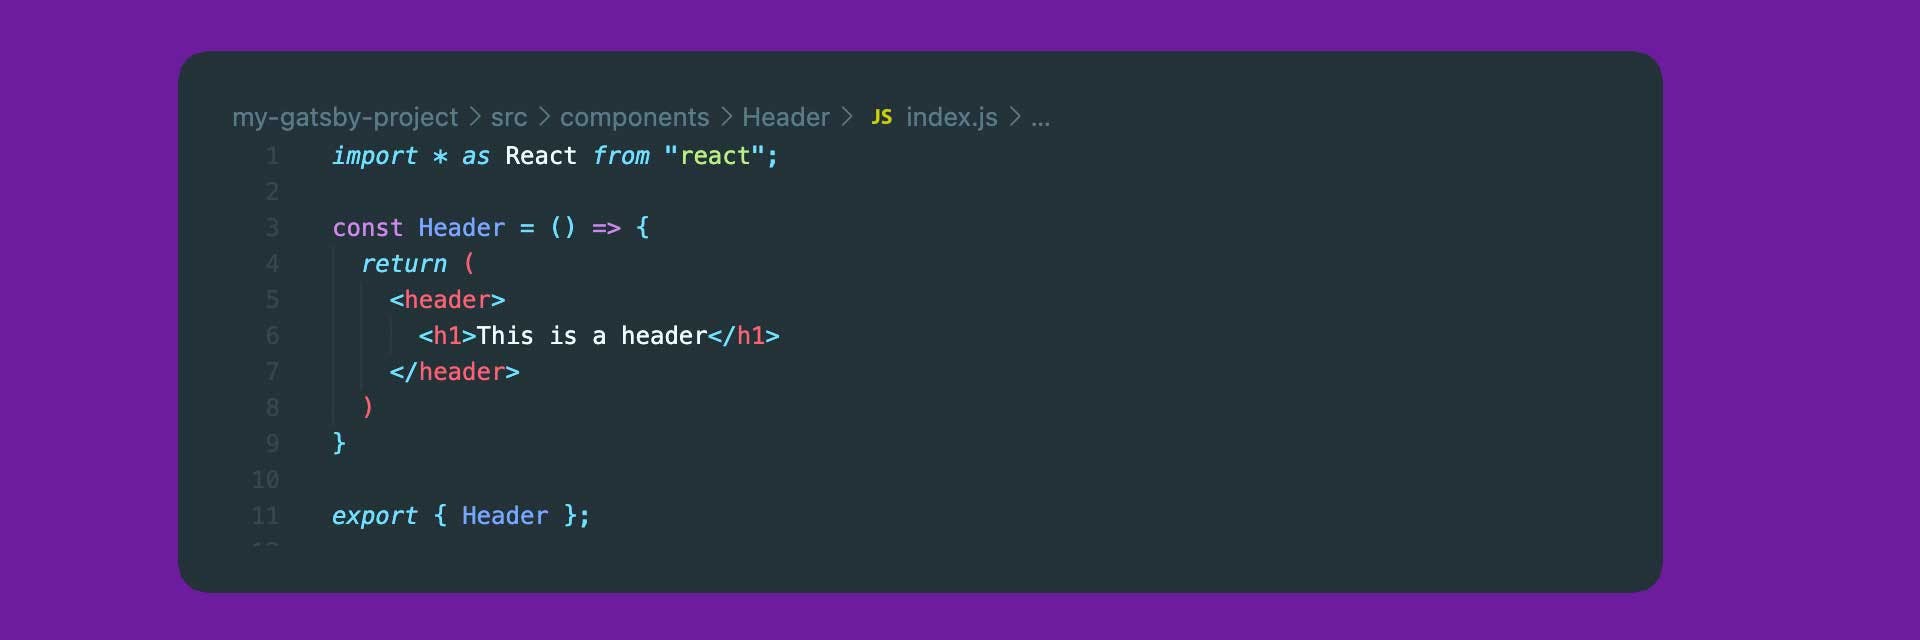
This is a really simple component. On line 1 we are simply import React and all of its elements to be used as and when we want. On line 3 we are declaring a variable called Header and we are assigning an arrow function to it (functional components are just functions that return JSX). Then from lines 4 to 8, we are returning some super basic HTML (although because we are mixing HTML & JS this is actually JSX).
What now I hear you ask. We've created our first super cool component, but where can we see it, what does it do?!! Well, we're going to add it to our page. The next step is to open up src/pages/index.js. This is the first page that React is supplying to the application, otherwise known as the entry point. Theres a lot going on in this file, but we're going to tidy it up.
Delete everything between the React import (line 1) and the arrow function (line 129). Now delete everything inside and including the <main> tag (line 5 to 54). Now place a <h1> tag in the render method.
Now you should have a really simple component, that is very similar to the <Header /> component that we created previously. Pages, just like any other components are just functions that return JSX.
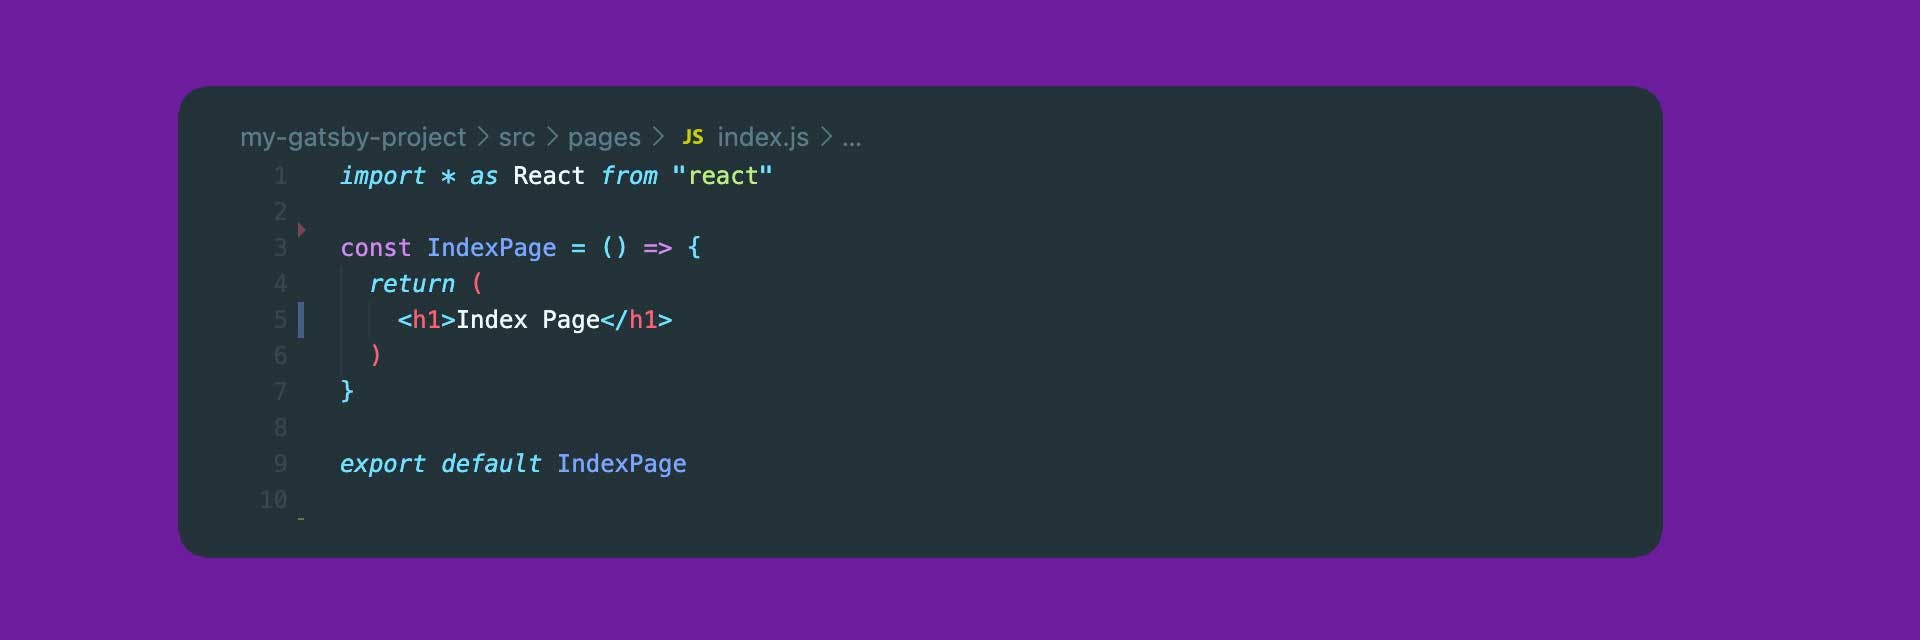
Now if you check your browser on http://localhost:8000/ (you may need to refresh), you should see a very rough heading.

Ok, the next step is to import the <Header /> component that we just created.
We import this in a very similar way to how we import React, although there are some differences. Because we exported our component as an object, we need to import it in the same way. We can destructure that object by wrapping the component name in wiggly brackets.
Once it's imported, we can add that component inside the return method. Because this component doesn't have any children, or any elements inside of it, we can use a self closing component as you'll see on line 6.
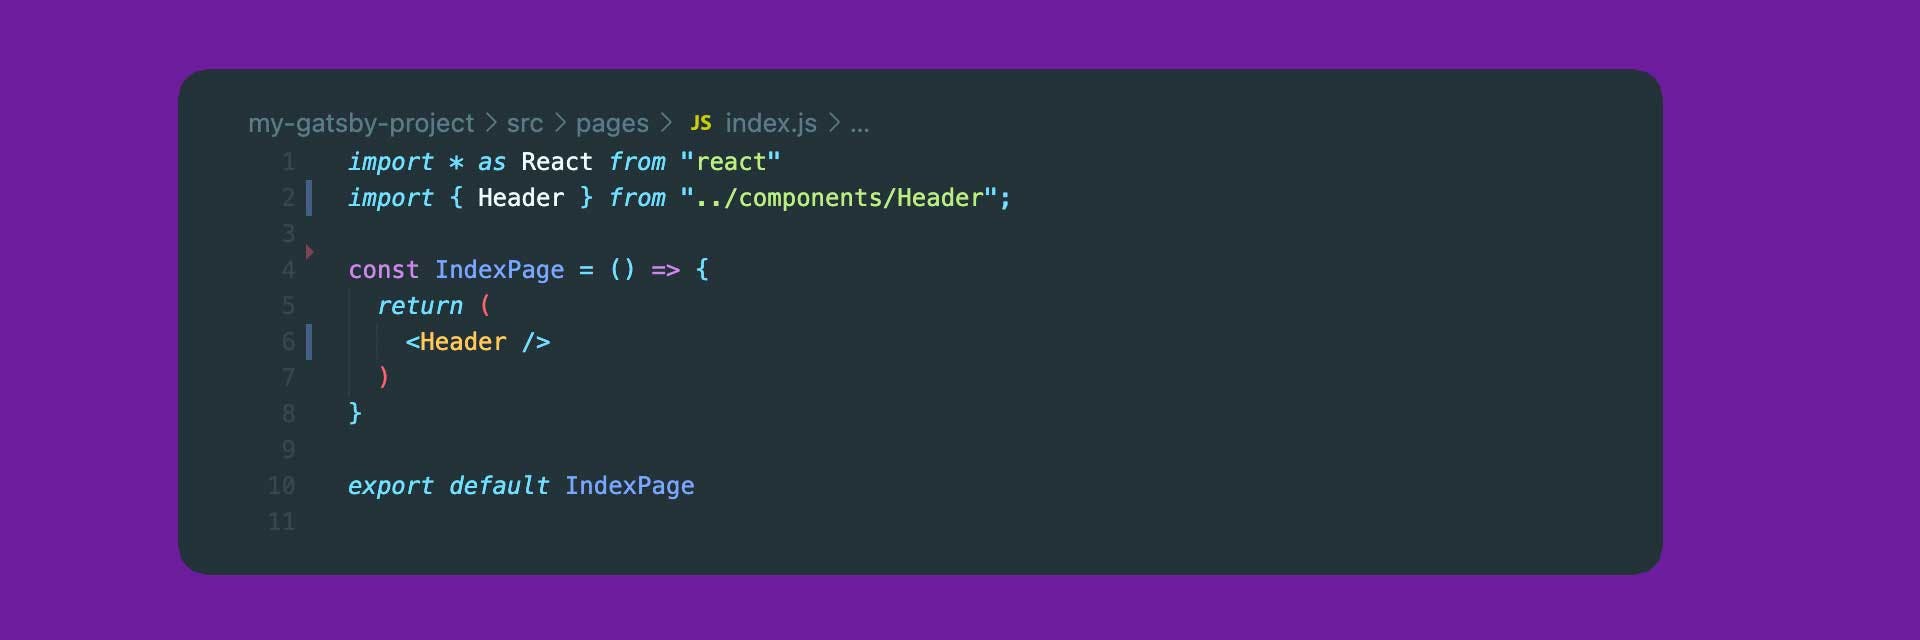
After you save that, look back at the browser, and you should see a very small difference. OUR HEADER IS NOW RENDERING IN THE BROWSER. Bloody hell - look at you, you little React developer.

Well, what a bloody lovely component we have here. On second thoughts this header is ugly AF. We need to get some sass business going to get this header looking lovely. The next step is to install Sass in our project, so that we can style these components. For a more in depth tutorial on how to do this, visit this link. But i'll explain the simple steps to getting it done. The first step is to stop the Gatsby build from running. Head over to your terminal, and hit CTRL & C, then run the following command:

This will install the standard Sass package, and also Gatsby Plugin Sass, which provides drop-in support for Sass/SCSS stylesheets.
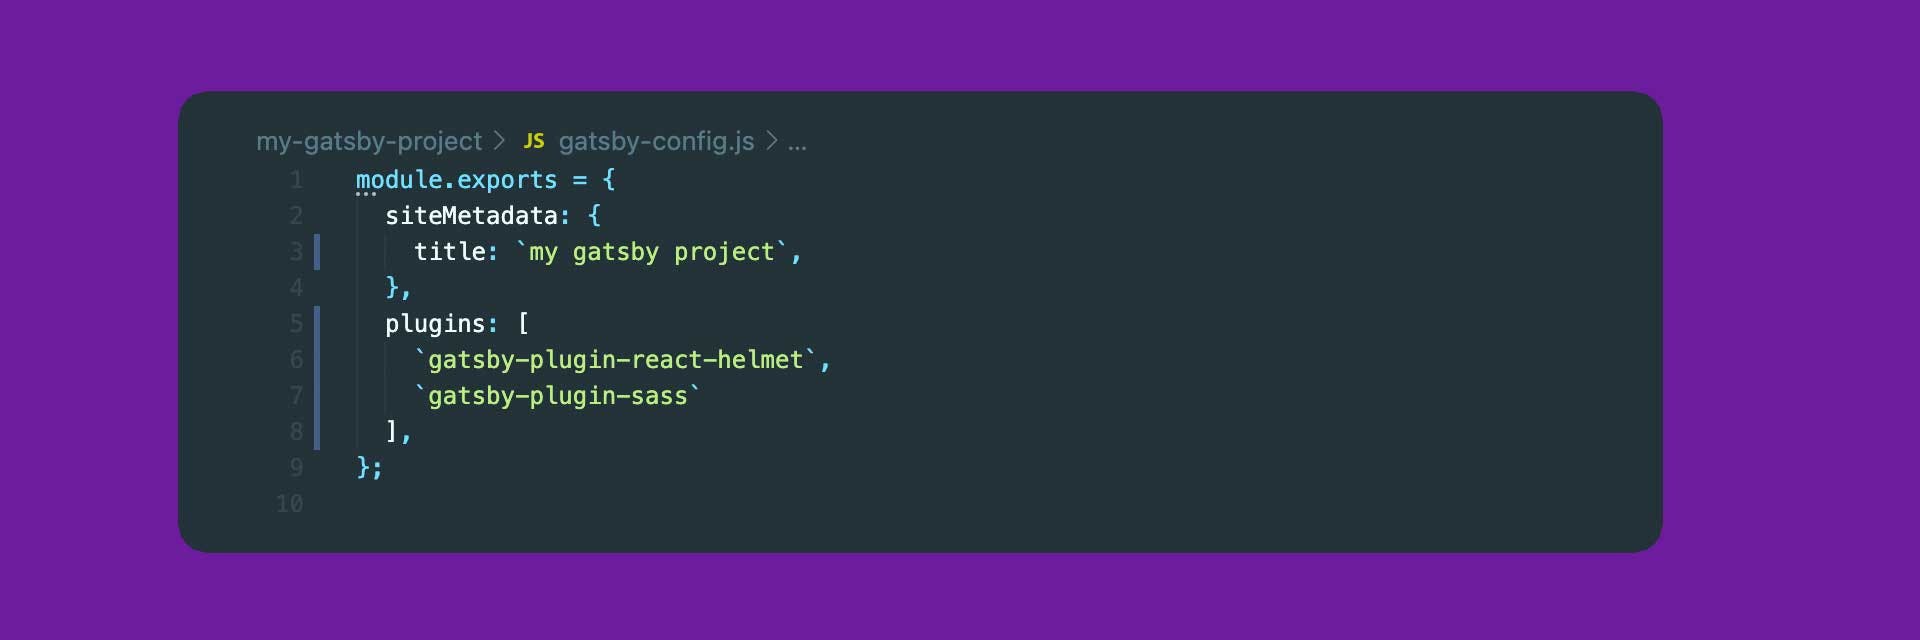
The next step is to open gatsby-config.js which is a file at the root of our project. In here you'll see a few things that might seem familiar. During the setup process we added React Helmet support, and you should see that inside the plugins array. If you don't, don't worry. We need to add the gatsby-plugin-sass reference to the plugins array, so that Gatsby knows to include that package at build time.
Now that Gatsby knows to include Sass in our project, we can start styling our components. Go back to the Header component, and next to the index.js file, create a file called styles.module.scss. We're going to be using CSS modules (sass in our case) here, which is a great way to make sure styles are locally scoped. This means that styles from different components can't override each other. Now that the styles file is created, we need to import that into our component.
The styles file is now imported into our project, but it't not doing anything yet. We need to put it to work. Head back to the styles file and lets add some styles to our header.
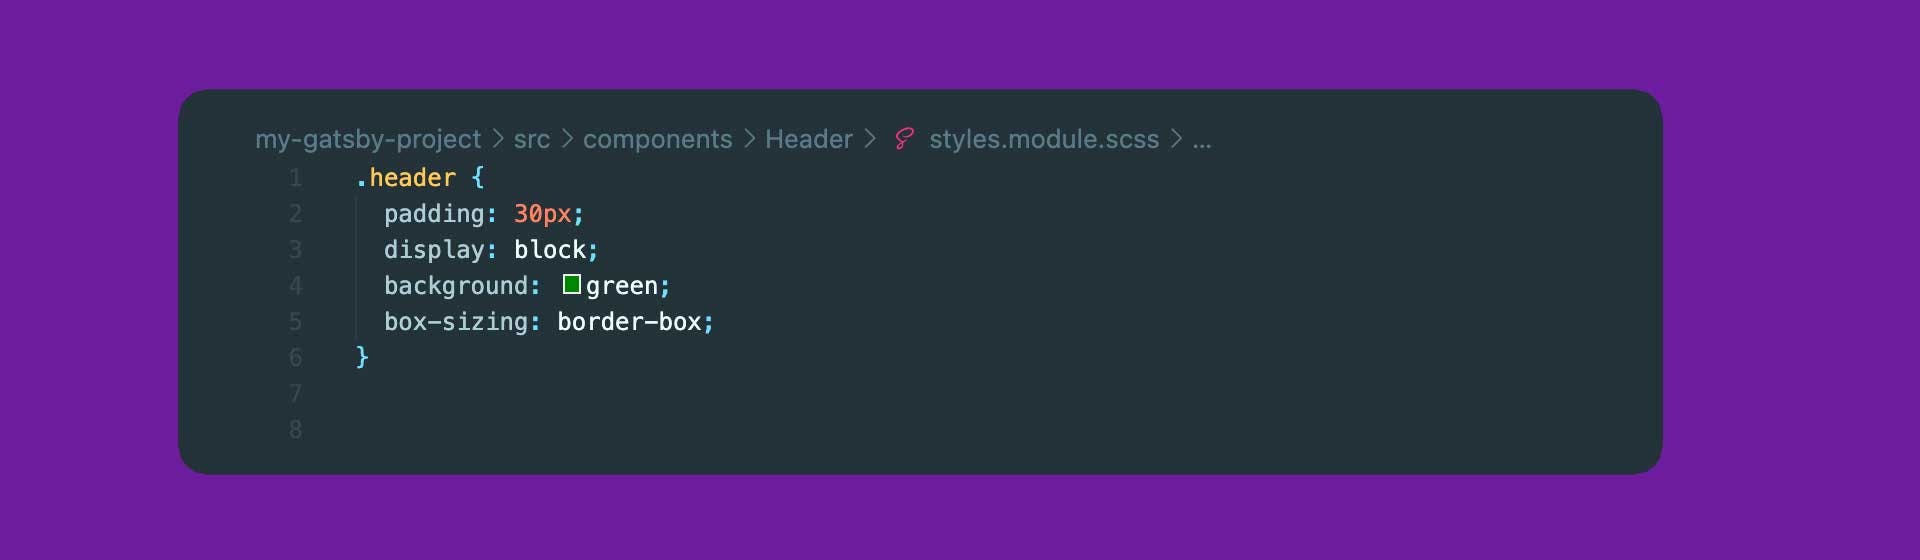
We're keeping things simple here. This will just make the header green with a bit of padding around the edges. Notice that we're using a class called header, rather than the HTML5 header element. It will become obvious why in a second. Let's head back to the index.js file, and we'll add some classes so that our styles pull through.
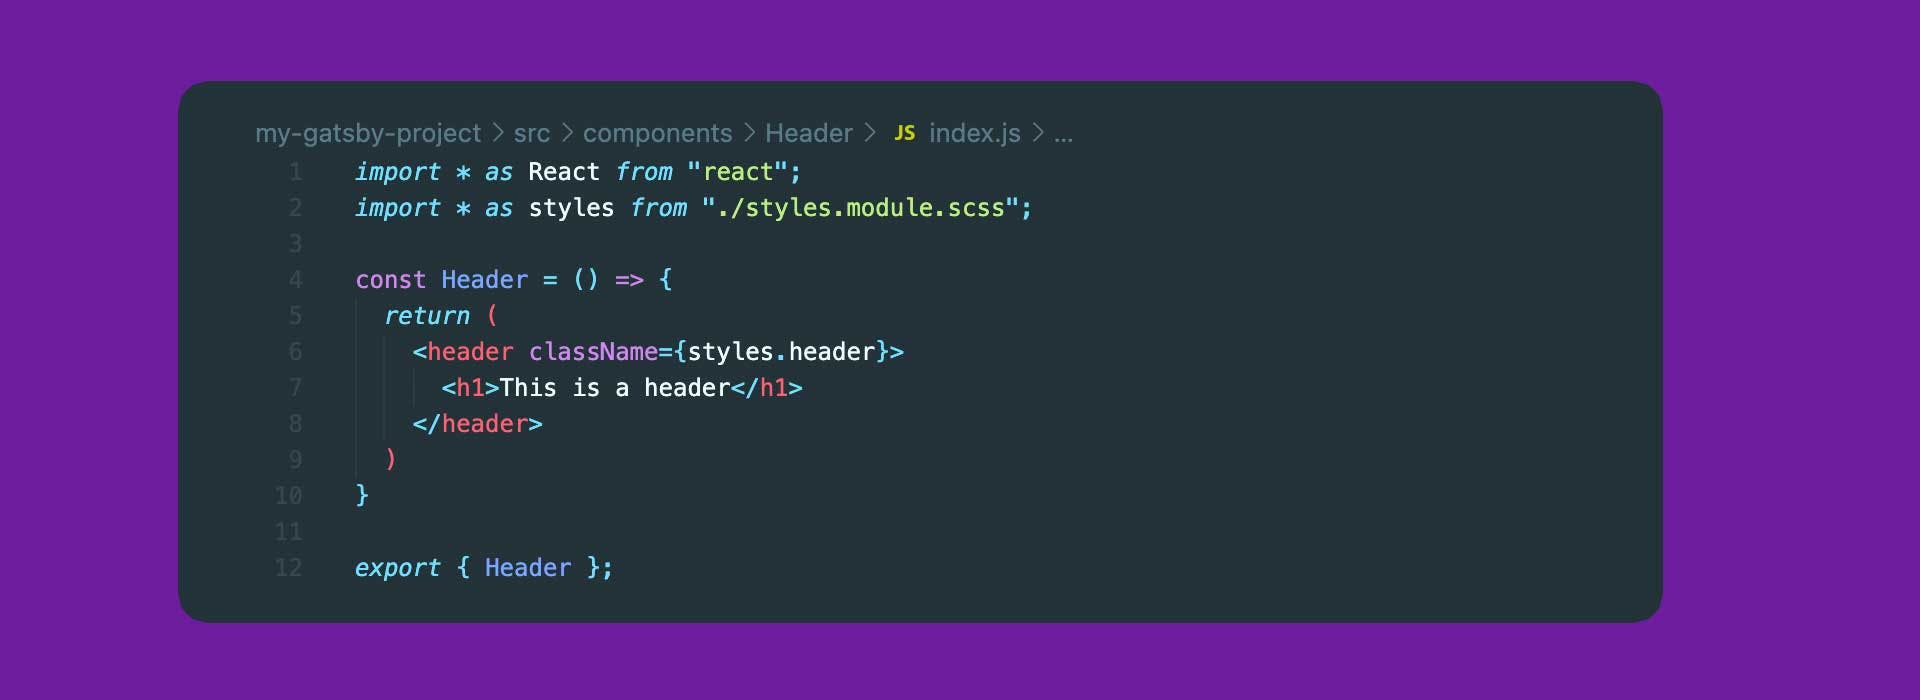
As you can see, we've added a class (react requires us to use the className syntax) to the header element. Then we are using wiggly brackets, which allows us to interpolate JavaScript into HTML - This is the big benefit of JSX. To explain what we're doing here, i'll log styles to the JavaScript console to show you what it comes back as.
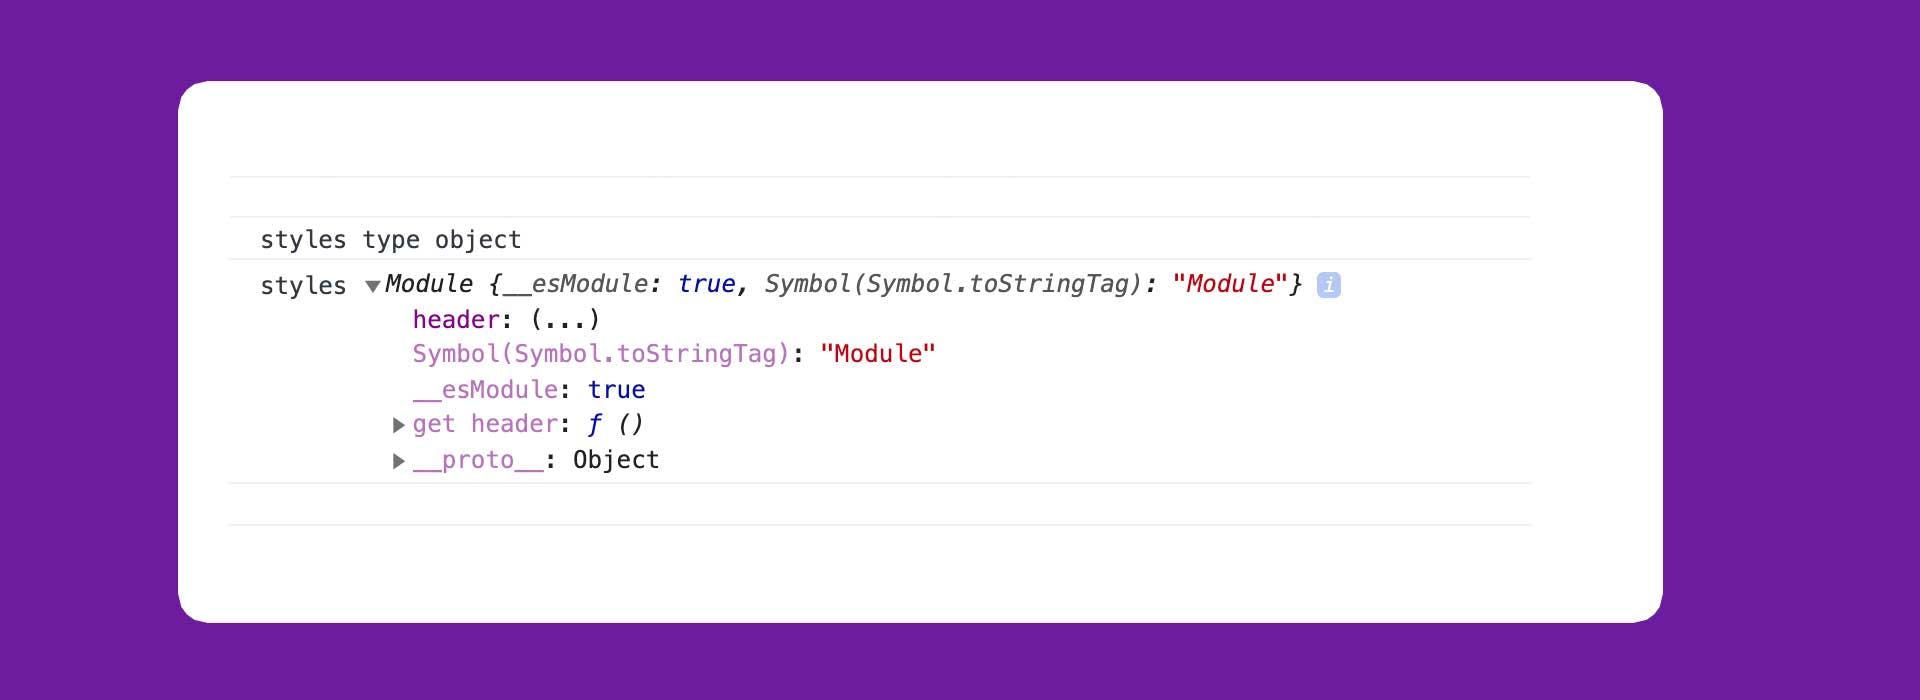
You can see here, that styles comes back as an object, and it has a child of header. That's why we need to use dot notation to call styles.header on line 6 of index.js. Now if you look back to your browser, you should see a lovely green header element.

Congratulations; you now have a beautiful ... header component.
In the next post, i'll show you how we can incorporate other components to create layouts, and reusable templates for more complex pages.
If you haven't already, be sure to check out the first post in the series!